Lexvision LV-Single-Blinder IP · Operating Manual · 10 pages
Model LV-Single-Blinder IPEdition EN · 09 / 2026 · V1 Document No. LVSBIP-EN-01
IP65 RGBAW LED Blinder · Spliceable
LV-Single-Blinder IP
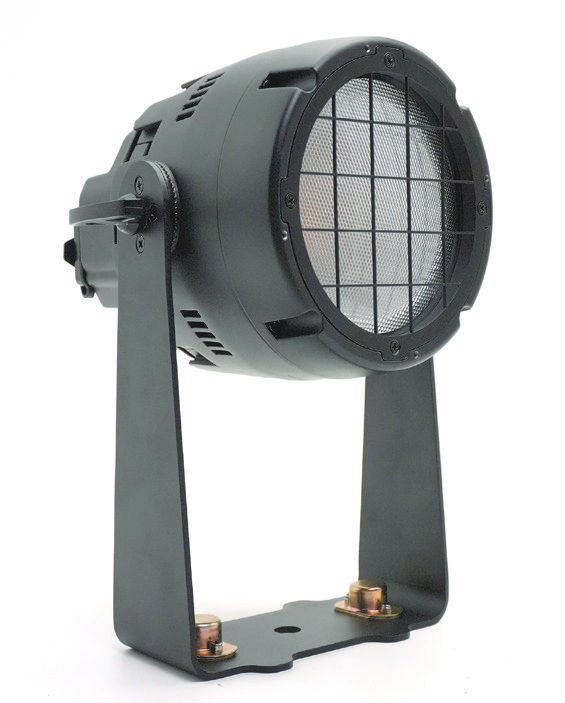
550 W RGBAW LED blinder with 50° beam angle, adjustable colour temperature 2,000 – 10,000 K and IP65 protection — can be combined into 2-lite and 4-lite blinders
Operating manual. Please read in full before first use and keep for future reference.
Light source
1 × 550 WRGBAW LED · 10,215 lm
Beam angle
50°field angle 87°
DMX
1 – 23channels · RDM
IP rating
IP65indoor & outdoor
Lexvision LV-Single-Blinder IPForeword · About this document
Foreword
00Welcome
Thank you for choosing the Lexvision LV-Single-Blinder IP — a weatherproof single-cell blinder with a 550 W RGBAW LED that can be spliced into 2-lite and 4-lite blinders as required.
This document describes set-up, operation, care and troubleshooting of the fixture. Read the manual — in particular the chapter Safety Instructions — in full before first use and keep it with the fixture. If the fixture is passed on to third parties, the manual must be included.
0.1Symbols used
WarningMarks situations in which persons may be injured or the fixture may be damaged. Always observe these instructions.
NoteMarks useful additional information, tips or explanations that aid understanding.
Danger — voltageMarks situations involving danger to life from electric current. Work on live parts is reserved for qualified personnel only.
0.2Intended use
The LV-Single-Blinder IP is a professional IP65-rated lighting fixture for stages, events and installations indoors and outdoors (operating temperature −15 °C to +45 °C). The fixture must not be operated on a dimmer circuit. Any other use is considered improper and voids the warranty.
0.3Package contents
1 × Lexvision LV-Single-Blinder IP with mounting bracket
Read this chapter in full before first use. Damage caused by disregarding these instructions is excluded from the warranty.
1.1General safety
Danger to life from electric currentDisconnect the mains supply on all poles before any work on the fixture. Make sure that voltage and frequency match the rating label (AC 100 – 240 V, 50 / 60 Hz). The protective earth conductor (yellow / green) must be properly earthed. Never operate the fixture on a dimmer circuit.
Use only the supplied waterproof Seetronic power cable. Damaged cables or plugs must not be used.
Choose a well-ventilated mounting location; do not cover the ventilation openings or the waterproof fan. The temperature protection automatically reduces brightness in case of overheating.
Keep flammable materials (curtains, decoration) away from the fixture — fire hazard.
Mount the fixture only via the mounting bracket and the safety attachment point; always use a safety cable.
Do not look directly into the LED source from a short distance — glare and risk of eye damage (550 W, 10,215 lm).
Housing and front glass heat up during operation. Allow the fixture to cool before handling.
Operating and starting temperature: −15 °C to +45 °C.
There are no user-serviceable parts inside — repairs by authorised personnel only.
1.2IP65 protection — outdoor use
The magnesium-aluminium alloy housing is dust-tight and protected against water jets from any direction. Always fully screw down power and DMX connectors — only then is the protection rating maintained. Close unused sockets with the protective caps.
Not for coastal or maritime environmentsDespite its IP65 rating, the fixture is not suitable for use in salty air — risk of corrosion. Damage caused by unsuitable environmental conditions is excluded from the warranty.
Fig. 2.1 — Front (Ø 145 front glass, width 215), rear with display, buttons, power IN / OUT and DMX OUT / IN (height 262.5), side view (height 273 · bracket 186.5), depth 145 · bracket foot 90. Dimensions in millimetres.
Connector (rear)
Description
POWER IN / OUT
Seetronic IP65, power linking of several fixtures
DMX IN / OUT
5-pin XLR IP65 (optional 3-pin), data can be linked through
Risk of fallingThe supporting structure must safely bear the fixture weight (2.35 kg per blinder; the total weight when spliced). Additionally secure each fixture with a safety cable of sufficient load rating in accordance with local regulations at the safety attachment point. Installation by qualified personnel only, never above walkways.
Unpack and inspectCarefully remove the fixture from the packaging and check for transport damage. Keep the packaging for transport or return shipment.
Choose the mounting locationWell-ventilated location; when used outdoors, route cables downwards so that no water accumulates around the connectors.
Fit the bracket & secureAttach the mounting bracket to the truss with an Omega clamp and tighten the wing screws. Attach the safety cable to the safety point.
Connect the DMX cableConnect the DMX output of the controller to DMX IN; link through to the next fixture via DMX OUT. Terminate the last fixture with 120 Ω.
Connect the power cablePlug in and lock the Seetronic cable; link through to the next fixture via power OUT (observe the total load of the circuit: 300 W per fixture).
Set channel mode & addressSet the channel mode and DMX start address (001 – 512) via the display (see chapter 4).
Power onOnce power is applied the fixture is ready for operation.
3.1Splicing into 2-lite and 4-lite blinders
The LV-Single-Blinder IP can be spliced without limit: several fixtures are connected via the bracket mounts and the connection points on the housing to form a 2-lite or 4-lite blinder. Power and DMX are linked through from fixture to fixture. Each spliced fixture receives its own DMX start address (address + channel count) — or all fixtures receive the same address to control them synchronously as one unit.
Master / slaveWithout a controller, one fixture can act as master and play an internal program; slave fixtures connected via DMX cable follow synchronously.
The fixture offers channel modes from 1 to 23 channels. The compact modes control dimmer or RGBAW directly; the extended modes add strobe, CCT, colour macros, dimming curve and 16-bit fine channels.
Channels
Typical content
1
Dimmer
3 · 4 · 5
Dimmer + strobe (+ CCT) or RGBA / RGBAW direct
8 · 9 · 10
Dimmer · strobe · R · G · B · A · W (+ CCT · macro)
12 · 14 · 15
+ fine channels (16 bit) for dimmer and colours
17 · 19 · 23
Full set: all colours 16 bit, CCT, macro, dimming curve, refresh, control channel
Channel assignmentThe exact assignment of the individual channels per mode is shown in the fixture menu under “Channel Mode” and is part of the manufacturer's DMX chart (fixture library). The channel number of the next fixture is the start address + channel count of the selected mode.
Activate DMX mode · check cable & signal · match address and channel mode
3
Flickering with several fixtures
Channel modes / addresses not synchronised · two masters active
Uniform settings · only one master · 120 Ω terminator
4
Brightness drops by itself
Temperature protection active
Check ventilation, clean the fan, let it cool down
5
Colour errors
LED or driver defective
Contact dealer
5.1Cleaning & care
Before cleaningDisconnect the fixture completely from the mains and let it cool down.
Clean the front glass and protective grid with a soft, lint-free cloth and mild glass cleaner — apply the cleaner to the cloth, not to the glass.
Regularly remove dust from the fan and cooling fins with oil-free compressed air — especially after use with fog or outdoors.
Keep seals and connectors clean and dry to maintain the IP65 protection.
Never open the fixture; maintenance by authorised dealers only.
Repairs by qualified personnel onlyNever attempt to open or repair the fixture yourself. Repairs carried out by unqualified persons can lead to damage or malfunction and void the warranty.
Lexvision LV-Single-Blinder IP— · Quick Reference & CE
Appendix
AQuick Reference
Quick Reference
LV-Single-Blinder IP
Key data
LED
1 × 550 W RGBAW · 10,215 lm
Angle
50° beam · 87° field
CCT
2,000 – 10,000 K · CRI 93
Power
300 W max. · 120 W constant
Weight
2.35 kg · IP65
Control
DMX
1 – 23 CH · RDM · Art-Net
Address
001 – 512
Modes
DMX · Auto · Master / Slave
Strobe
1 – 25 Hz
Refresh
800 Hz – 25 kHz
First aid — fault diagnosis
—
No light? → check mains & fuse
—
No DMX? → address + mode + 120 Ω
—
Dimmer? → temperature protection, clean fan
—
Not for coastal / maritime environments!
BEU Declaration of Conformity
The manufacturer declares under its sole responsibility that the Lexvision LV-Single-Blinder IP complies with the relevant EU harmonisation legislation (LVD 2014/35/EU, EMC 2014/30/EU, RoHS 2011/65/EU). The signed EU Declaration of Conformity is available as a separate document and can be requested from Lexvision GmbH, Waldweg 26, 54636 Sefferweich, Germany, by email to verkauf@lexvision.de or by phone on +49 (0) 651 14567727.
Lexvision LV-Single-Blinder IP · Operating Manual · Edition EN 09/2026 · V1 · Document No. LVSBIP-EN-01 · Subject to technical changes and errors.